 10 years of water leakage warranty for Regrouting showers.

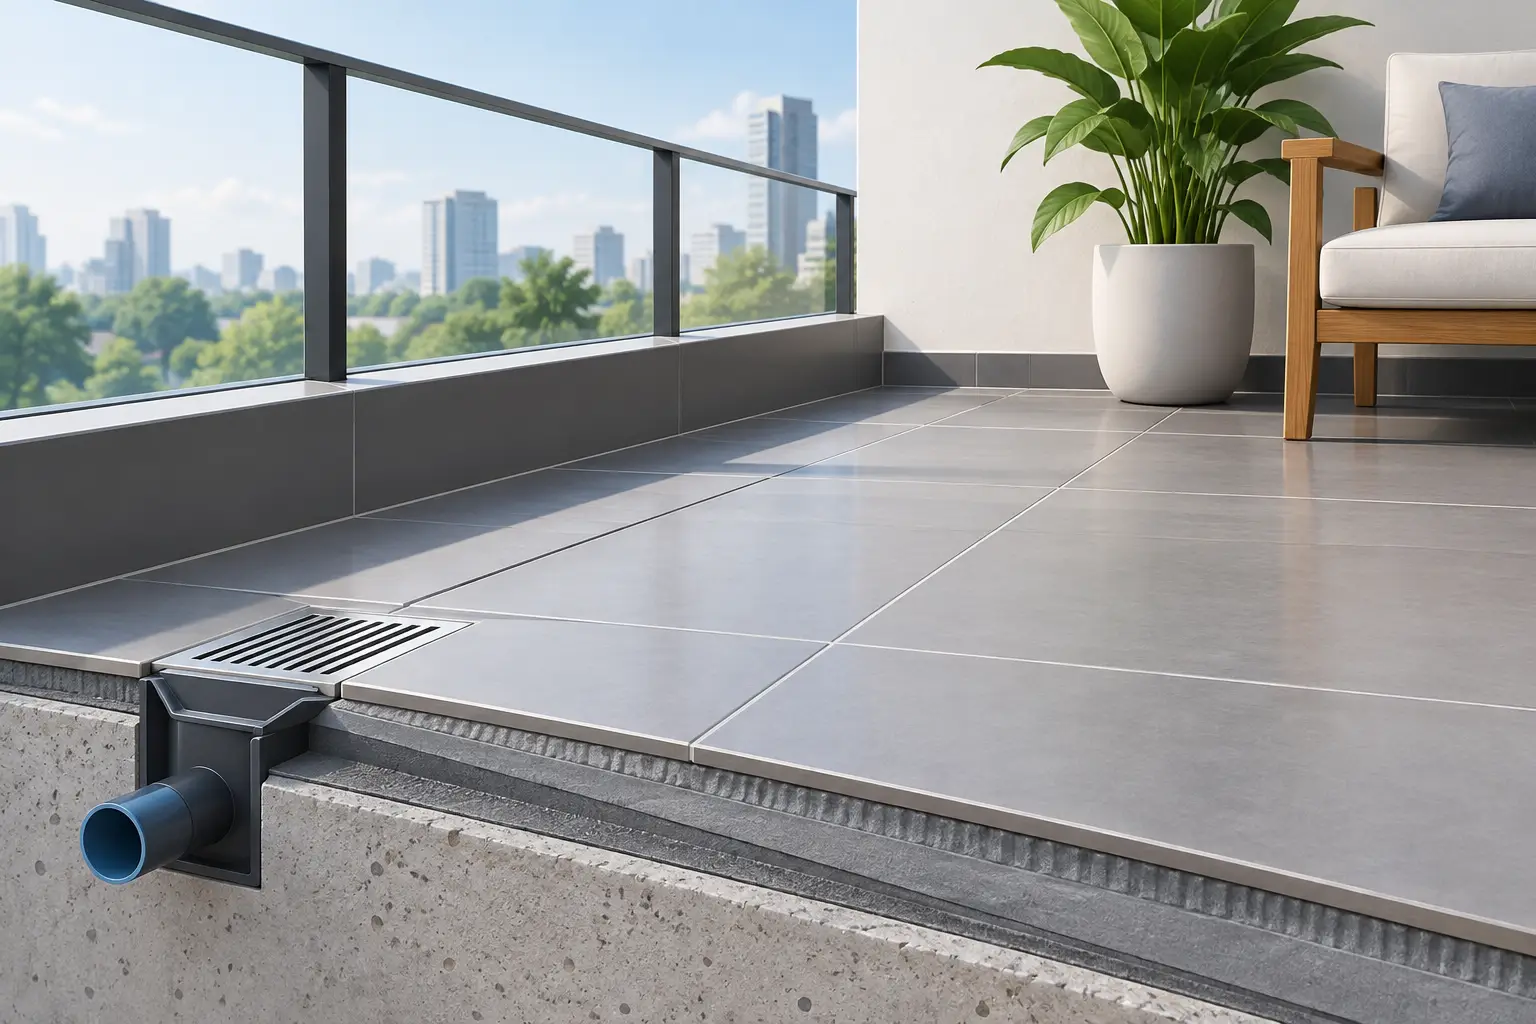
A balcony can look beautifully finished on day one and still fail after the first heavy downpour. The difference is usually beneath the tile surface. This balcony drainage tiling example shows how considered falls, waterproofing, drain placement and precise tile installation work together to protect the space below while delivering a polished outdoor finish.
For homeowners, landlords and property managers, balcony drainage is not a cosmetic detail. Water that sits on tiles, seeps into grout lines or reaches an unprotected edge can lead to staining, loose tiles, leaks and costly repairs to the rooms beneath. A properly tiled balcony should direct water where it belongs, dry efficiently and remain easy to maintain.
A practical balcony drainage tiling example
Picture a first-floor balcony outside a main bedroom. It has a tiled floor, rendered walls, a metal balustrade and a single floor waste positioned near the outer edge. The goal is to create a clean tiled surface that drains toward the waste without obvious slopes, puddles or awkward tile cuts.
The work begins with the substrate, not the tiles. The concrete base must be sound, clean and shaped with an appropriate fall toward the drainage point. In many balcony layouts, a fall of around 1:100 is used as a practical guide, although the required fall depends on the drainage design, tile format, surface condition and applicable building requirements. A very shallow fall can leave water sitting on the balcony. An excessive fall can feel uncomfortable underfoot and make furniture difficult to level.
Once the falls are established, the waterproofing system is applied across the floor and turned up at walls, door thresholds and other junctions. Careful treatment around the waste is essential. This is the point where water is intentionally collected, so the membrane and drain connection must work as one continuous system.
After waterproofing has cured, tiles are set with a suitable adhesive, aligned to support the planned drainage direction. The finished floor should guide water to the waste while retaining crisp grout joints and a balanced pattern. It is a technical result, but it should also look effortless.
The drainage detail that makes the difference
A balcony floor is made of several layers, and each one has a specific job. The structural base provides support. The screed or formed substrate creates fall. Waterproofing protects the building below. Adhesive secures the tiles, while grout completes the surface and helps keep joints clean and presentable.
Tiles and grout are not the waterproofing layer. This misunderstanding causes problems when people assume that replacing cracked grout alone will stop a balcony leak. Grout is a finish material. Even well-installed grout is not designed to be the sole defence against water entering the structure.
In a quality installation, the balcony waste should be selected and positioned before tile layout is finalised. A square waste can be neatly integrated with square or rectangular tiles, while a linear drain may suit a contemporary threshold detail or a larger balcony with a single-direction fall. Neither option is automatically better. The right choice depends on the balcony shape, door location, drainage capacity and the desired visual finish.
Planning tile cuts around the waste
Drain placement has a direct effect on how refined the job looks. A floor waste set in the middle of a full tile may appear neat on a simple balcony, but it can create four angled cuts when falls converge from multiple directions. These cuts need to be measured precisely so the tile edges sit evenly around the grate.
For larger-format porcelain tiles, a linear drain can reduce the need for multiple intersecting falls. This may allow a cleaner tile layout, particularly where the floor falls in one direction away from the building. However, linear drainage needs careful detailing at the drain body and often requires closer coordination with the waterproofing system.
Small mosaics are another practical option around a centrally located waste. Their many grout joints allow them to follow changes in fall more naturally than large tiles. The trade-off is that mosaics have more grout to clean over time. For a low-maintenance balcony, the tile size and layout should be chosen for both drainage performance and ongoing care.
Choosing tiles that suit an Australian balcony
Outdoor balconies face harsh conditions: direct sun, wind-driven rain, dust, leaf litter and regular temperature changes. The ideal tile needs to be suitable for external use, provide appropriate slip resistance and remain stable in the conditions it will face.
Porcelain is often a strong choice because it is dense, durable and available in finishes that suit modern homes, apartment balconies and commercial entries. A matte or structured surface can provide better grip than a highly polished tile, especially when wet. Appearance matters, but a glossy tile that becomes slippery after rain is rarely the best fit for an exposed balcony.
Tile size should be selected with drainage in mind. Large-format tiles can create a spacious, high-end look, but they demand a flatter, more controlled substrate and thoughtful drain placement. Smaller tiles offer more flexibility where several falls meet. There is no single best size – the balcony design should determine the tile, not the other way around.
Movement joints also deserve attention. Balconies expand and contract as temperatures change, particularly in full sun. Correctly placed movement joints help accommodate that movement and reduce the risk of cracking or tenting. They should be planned into the tile layout rather than treated as an afterthought.
Waterproofing and thresholds need equal care
The area at the balcony door is one of the most sensitive parts of the installation. Water must drain away from the doorway, and the finished tile height must work with the threshold detail without creating a path for wind-driven rain to enter indoors.
This is where experienced assessment is valuable. Some balconies have limited height available beneath a sliding door, while others may have existing tile levels that cannot be substantially altered. In these cases, the installation approach may need to change. It could involve a different tile thickness, a revised drainage location or corrective work to the substrate before tiling begins.
Wall junctions, balustrade posts and penetrations also need disciplined waterproofing treatment. A beautiful tile pattern cannot compensate for a weak detail at the edge of the balcony. Precision at these transitions is what supports long-term performance.
Common balcony drainage failures to avoid
The most obvious warning sign is ponding water that remains long after rain has stopped. Small amounts of residual moisture can occur on textured tiles or around a grate, but widespread puddles suggest inadequate falls or an uneven surface.
Cracked grout, hollow-sounding tiles, white mineral staining and dark marks at the ceiling below can also indicate a deeper issue. The visible tile surface may be the first place a problem appears, but the cause can sit within the substrate, waterproofing layer or drainage connection.
Avoid simply tiling over an existing balcony without checking its condition. Adding another layer can raise the floor level at doorways, hide existing damage and interfere with drainage. Likewise, sealing grout may improve stain resistance, but it will not correct failed waterproofing or a balcony that falls away from the drain.
A proper assessment identifies whether the issue is limited to surface repairs or whether the balcony needs more extensive rectification. This protects the value of the work and avoids paying twice for a finish that cannot perform.
What a quality finished balcony should look like
A well-executed balcony does not announce its technical complexity. The tiles sit level within the planned falls, grout joints are consistent, cuts around drains are clean and the surface drains without distracting puddles. Edges and thresholds look deliberate, not improvised.
Just as importantly, the balcony should feel practical to use. Furniture should sit comfortably, the surface should offer suitable grip, and regular cleaning should be straightforward. Sweeping away leaves and rinsing the area periodically helps keep wastes clear, especially after storms.
At A1 Grouting & Tiling, balcony work is approached as both a protective building detail and a visible design feature. Precision preparation, suitable materials and flawless alignment create an outdoor surface that adds value to the property rather than creating another maintenance concern.
Before choosing a tile colour or pattern, look at where the water will travel. When drainage is planned first, the finished balcony has the clean lines, durability and confidence that a quality outdoor space deserves.