 10 years of water leakage warranty for Regrouting showers.
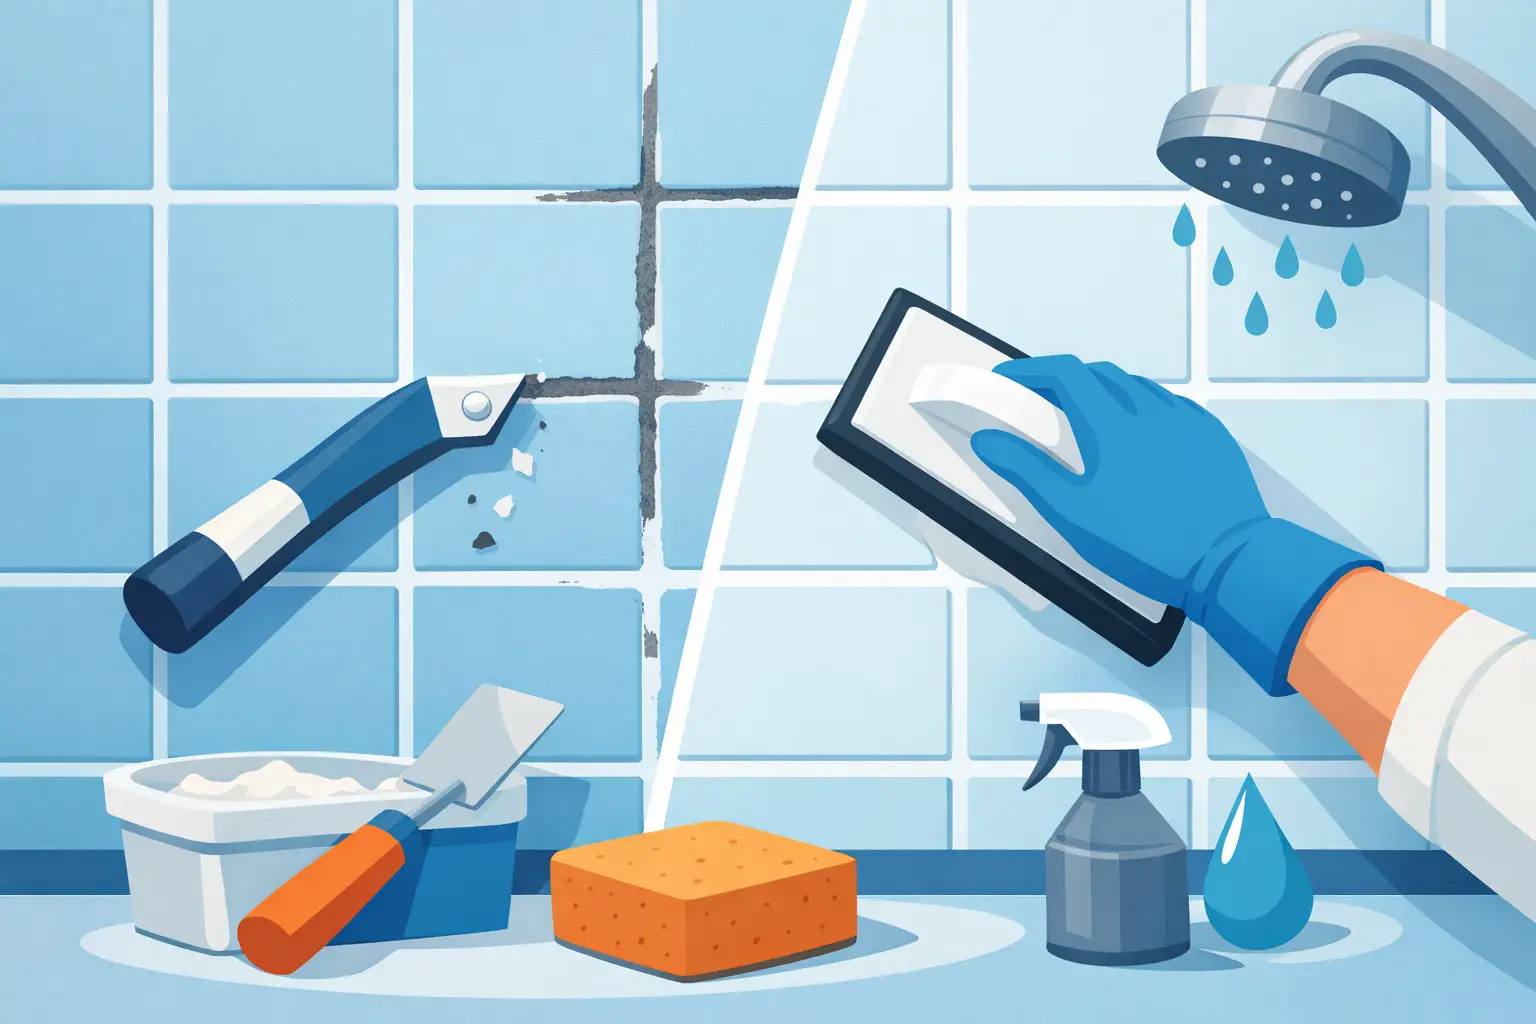
A shower rarely fails all at once. It usually starts with a few hairline cracks in the grout, some discolouration around the corners, or patches that never seem to look clean no matter how hard you scrub. If you are wondering how to regrout shower tiles, the good news is that tired grout can often be replaced without stripping out the entire shower. The catch is that the finish depends on careful preparation, clean removal, and choosing the right products for a wet area.
Regrouting is not just a cosmetic fix. In a shower, grout helps protect the tiled surface by closing the gaps between tiles and reducing the path for moisture, soap residue, and mould. When grout starts breaking down, water can work its way into places it should not be. That can lead to loose tiles, musty smells, stained joints, and in more serious cases, damage behind the walls or under the floor.
When regrouting is the right fix
Not every shower needs a full rebuild, but not every shower is a candidate for straightforward regrouting either. If the tiles are still well bonded, the substrate is sound, and the main issue is cracked, mouldy, hollowed, or missing grout, regrouting can restore both appearance and performance.
If tiles are drummy, moving, or lifting, the problem usually goes deeper than the grout line. The same applies if the shower is leaking due to failed waterproofing or if silicone joints have been neglected for years and moisture has already spread into surrounding materials. In those cases, regrouting may improve the look temporarily, but it will not solve the root issue.
That is why inspection matters. A clean-looking finish means very little if the surface underneath is compromised.
Tools and materials you will need
For most shower regrouting jobs, you will need a grout saw or oscillating multi-tool with a grout removal blade, a vacuum, clean cloths, a bucket, sponge, grout float, safety glasses, gloves, and the correct grout for the tile joint width and location. You will also need sanitary-grade silicone for movement joints, especially in corners and where walls meet the shower base or floor.
The grout itself matters more than many people realise. Cement-based grout is common and works well when mixed and applied correctly, but some showers benefit from higher-performance options with mould resistance or improved flexibility. Epoxy grout offers strong stain resistance and durability, though it is less forgiving to apply and usually better handled by an experienced tradesperson.
How to regrout shower tiles step by step
1. Remove the old grout carefully
This is the stage that sets the quality of the result. Old grout needs to be removed to a sufficient depth so the new grout can bond properly. As a rule, aim to remove at least 2 to 3 millimetres, or more if the grout is loose and deteriorated deeper into the joint.
Work slowly and keep the tool centred in the grout line. Chipping the tile edges will spoil the finish and create weak spots that are difficult to hide later. Corners and tile edges need extra care, especially with glossy ceramic or porcelain tiles that show every mark.
A rushed removal stage is one of the main reasons DIY regrouting fails. Leaving weak grout behind can stop the new material from bedding consistently, and the fresh joints may crack or powder far sooner than expected.
2. Clean the joints thoroughly
Once the old grout is out, remove all dust and debris with a vacuum. Then wipe the joints with a damp cloth or sponge and allow them to dry as needed according to the grout manufacturer’s instructions.
This part seems simple, but it is essential. Dust left in the joints can interfere with adhesion and lead to patchy curing. In showers with soap build-up, body oils, or mould, the surface may also need a proper clean before new grout goes in. If contaminants remain, they can affect both bond strength and appearance.
3. Check for hidden issues before regrouting
Before mixing new grout, inspect the shower closely. Look for loose tiles, cracked silicone, signs of water staining outside the shower, and any softness in adjacent walls or skirtings. If you spot movement in the tiled surface, stop there and investigate further.
This is where a lot of homeowners save themselves money by not pressing on blindly. Regrouting over a moving or moisture-damaged substrate is like painting over a crack in plaster. It might look improved for a short while, but it will not stay that way.
4. Mix and apply the new grout
Mix the grout to the consistency specified on the product label. Too much water weakens the mix, affects colour consistency, and can contribute to shrinkage or cracking. Too dry, and it becomes difficult to press fully into the joints.
Using a grout float, work the grout diagonally across the tiles and force it firmly into the joints. The goal is full, compact joints without voids. Work in manageable sections so you can clean the tile face before the grout starts setting too hard.
If your shower has textured tiles or narrow joints, application may take a little more patience. There is no prize for speed here. A clean, even fill is what creates the crisp finish people notice.
5. Clean the tile surface at the right time
After the grout begins to firm up, wipe the tile surface with a damp sponge using light, controlled passes. Rinse the sponge often and avoid dragging too much water across the joints.
Overwashing is a common mistake. It can pull grout from the joints, lighten the colour, and create an uneven finish. The aim is to remove residue from the tile face while leaving the joints full and neatly shaped.
Once a light haze forms, buff it off with a dry microfibre cloth or as recommended by the product instructions.
6. Replace silicone in corners and movement joints
This part is often misunderstood. Internal corners and junctions should generally not be filled with grout. These are movement joints, and they need a flexible sealant, typically sanitary silicone designed for wet areas.
If you grout these joints instead of sealing them properly, cracking is likely. Silicone handles movement far better and helps maintain a watertight finish where planes meet. For a shower to look sharp and perform well, the grout and silicone need to work together, not compete.
How long should regrouted shower tiles last?
That depends on the condition of the shower, the quality of preparation, the grout product used, and how well the enclosure is maintained afterwards. A well-executed regrouting job can last for years, particularly when the shower is ventilated properly and cleaned with suitable products.
Harsh chemical cleaners, constant dampness, and ignored silicone failure will shorten the lifespan. So will poor workmanship. Even premium grout cannot compensate for shallow removal, dusty joints, or movement in the tile bed.
Common mistakes to avoid
The biggest mistake is treating regrouting as a surface tidy-up. In reality, it is a repair task that needs precision. Removing too little grout, using the wrong product, grouting over movement joints, or exposing the shower to water before full cure can all compromise the result.
Another common issue is confusing stained grout with failed grout. If the grout is structurally sound but discoloured, a deep clean or grout colour seal may be enough. If it is cracking, crumbling, or missing, replacement is the better path.
There is also a difference between regrouting a small section and regrouting an entire shower. Spot repairs can work, but colour matching older grout is difficult. In visible shower areas, partial repairs often stand out.
When professional shower regrouting makes more sense
Some homeowners are comfortable tackling basic tile maintenance, but shower regrouting can become fiddly quickly. Tight corners, fragile tile edges, previous repairs, and signs of leakage all raise the stakes. A poor result is not just untidy. It can allow moisture to keep doing damage behind the scenes.
Professional regrouting is usually the better option when the shower is actively leaking, when there is widespread grout failure, when mould keeps returning, or when the finish needs to match the standard of a renovated bathroom. The value is not only in the neatness of the joints. It is in the diagnosis, the preparation, and the confidence that the work has been carried out properly.
At A1 Grouting & Tiling, that standard matters because shower repairs are not just about making an old bathroom look fresher. They are about restoring a clean, durable, well-finished wet area that performs as it should.
Keeping the new grout in good condition
Once the shower has cured fully, keep maintenance simple and consistent. Use a mild cleaner suitable for tiled wet areas, avoid abrasive scrubbing where possible, and keep the shower ventilated so moisture does not linger on the surface. Wiping down excess water after use can also reduce soap scum and mineral build-up.
If the grout has been sealed, follow the maintenance guidance for that product. Sealing can help with stain resistance in some cases, but it is not a substitute for proper cleaning or sound waterproof construction.
A shower with fresh grout should look crisp, clean, and properly finished. More importantly, it should give you confidence that the tiled surface is protected, not just improved on the surface. If you are weighing up how to regrout shower tiles, the real question is not only whether you can do it. It is whether the shower underneath is ready for a repair that will actually last.